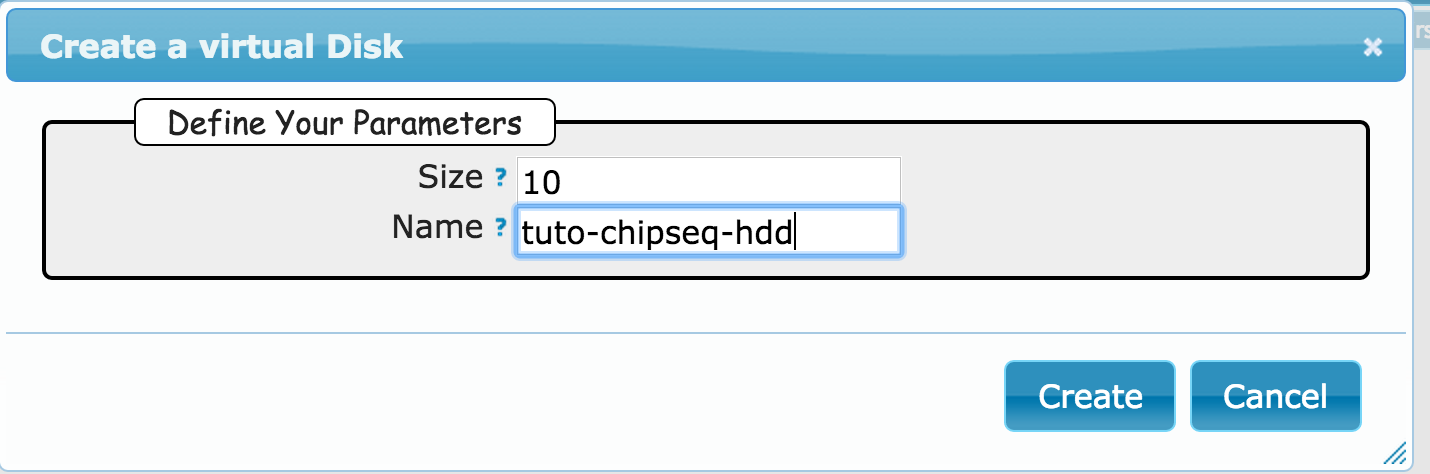
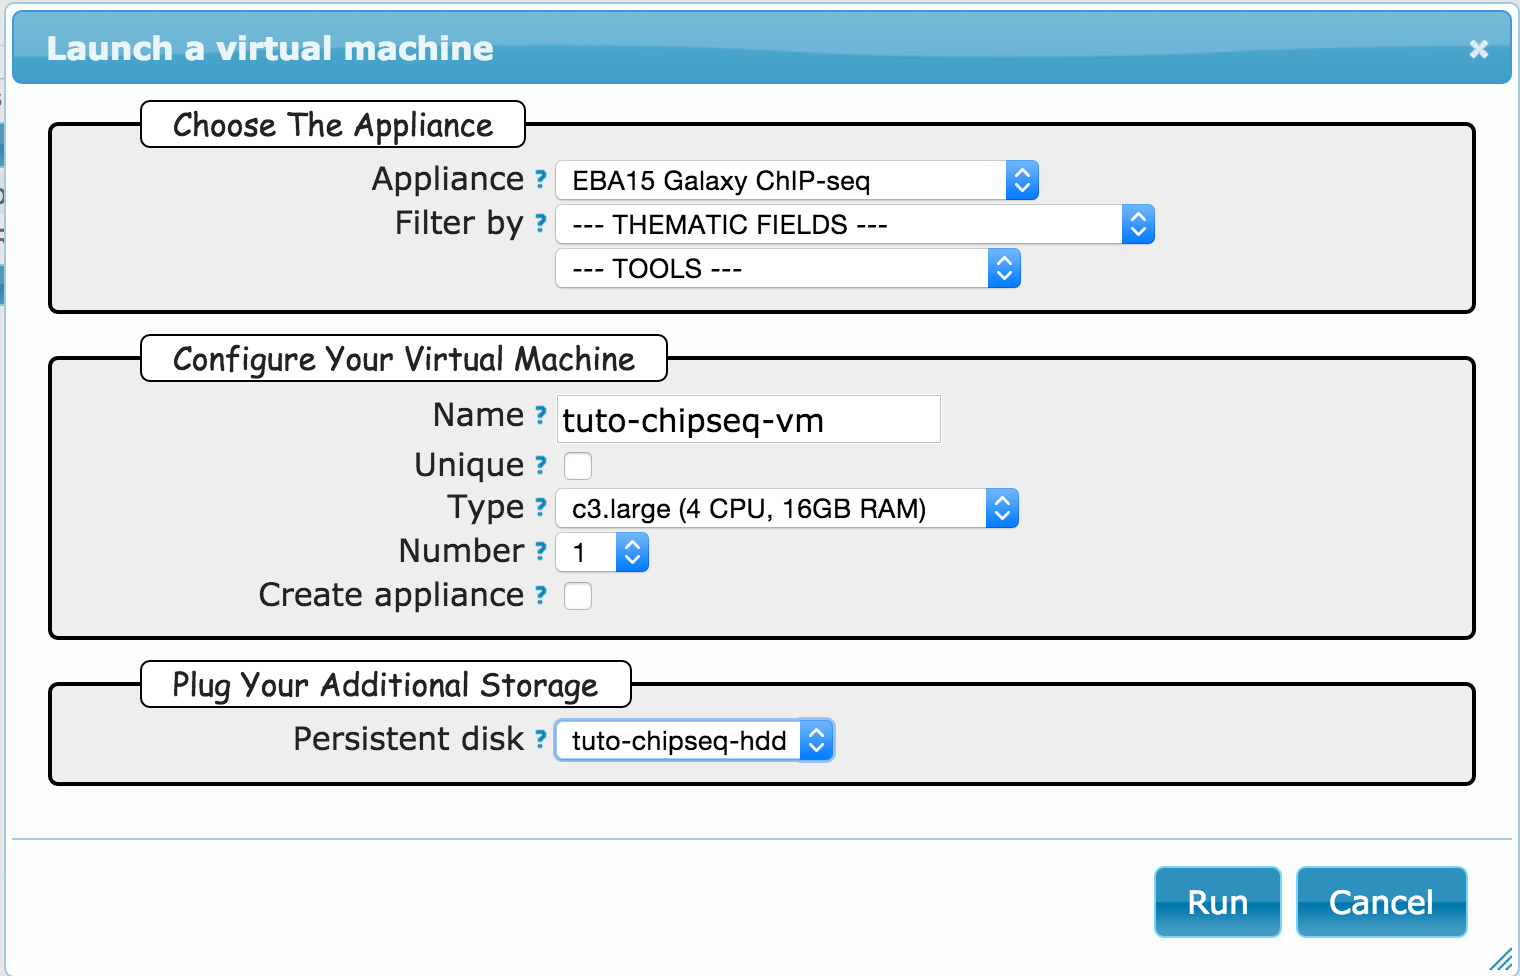
Goal: this first exercice is meant to
demonstrate how one can typically retrieve published
datasets from the Gene Expression Omnibus website,
for further analysis. However, we will then use
datasets that have already been downloaded and
pre-processed to save time. .
1 - About the dataset
For this tutorial we will use ChIP-seq datasets
produced
by Theodorou et
al. The authors used ChIP-Seq technology in
order to systematically identify Estrogen receptor
(abbreviated as ER or ERS1) binding regions across
the human genome. Importantly, they demonstrated
that knock-down of GATA3 through siRNA strongly
affect ESR1 binding sites. The corresponding
abstract of the article is provided below.
Abstract
Estrogen receptor (ESR1) drives growth in the majority of human breast cancers by binding to regulatory elements and inducing transcription events that promote tumor growth. Differences in enhancer occupancy by ESR1 contribute to the diverse expression profiles and clinical outcome observed in breast cancer patients. GATA3 is an ESR1-cooperating transcription factor mutated in breast tumors; however, its genomic properties are not fully defined.
In order to investigate the composition of enhancers involved in estrogen-induced transcription and the potential role of GATA3, we performed extensive ChIP-sequencing in unstimulated breast cancer cells and following estrogen treatment. We find that GATA3 is pivotal in mediating enhancer accessibility at regulatory regions involved in ESR1-mediated transcription. GATA3 silencing resulted in a global redistribution of cofactors and active histone marks prior to estrogen stimulation. These global genomic changes altered the ESR1-binding profile that subsequently occurred following estrogen, with events exhibiting both loss and gain in binding affinity, implying a GATA3-mediated redistribution of ESR1 binding. The GATA3-mediated redistributed ESR1 profile correlated with changes in gene expression, suggestive of its functionality. Chromatin loops at the TFF locus involving ESR1-bound enhancers occurred independently of ESR1 when GATA3 was silenced, indicating that GATA3, when present on the chromatin, may serve as a licensing factor for estrogen-ESR1-mediated interactions between cis-regulatory elements. Together, these experiments suggest that GATA3 directly impacts ESR1 enhancer accessibility, and may potentially explain the contribution of mutant-GATA3 in the heterogeneity of ESR1+ breast cancer.
Within the article, there is a section mentioning the accession number of the dataset produced :
Data access
The microarray data and ChIP-seq data from
this study have been deposited in the NCBI Gene
Expression Omnibus (GEO) (http://www.ncbi.nlm.nih.gov/geo/)
under accession nos. GSE39623
and GSE40129, respectively.
2 - Find the dataset on Gene Expression Omnibus
Gene Expression Omnibus (GEO)
is a public repository that provide tools to
submit, access and mine functional genomics data.
Data may be related to array- or sequence-based
technologies. For HTS data, GEO provides both
processed data (such as *.bam, *.bed, *.wig files)
and links to raw data. Raw data are available from
the Sequence Read Archive (SRA)
database (including 454, IonTorrent, Illumina,
SOLiD, Helicos and Complete Genomics). Both web
sites propose search engines to query their
databases.
Procedure :
- Go to GEO
web site.
- Choose "Search" and paste GSE40129
(GSE stands for GEO Series Experiment). Click
"GO" to get information about this
experiment.
- In the "sample section" (middle of the
page), click on "More" to visualize all sample
names.
- Click on GSM986059 hyperlink (GSM stands
for GEO SaMple) to get information about
this sample.
- In the "relations" section, select
"SRX176856" hyperlink to open the SRA page
corresponding to this sample.
- Click on the SRR link (bottom left) to
access the record of the run.
- On the new page, click on the Reads
tab to view the read sequence.
From there, you might also download the dataset
as a .sra file, but we will not do it in the
context of this practical (beware, this
would take time and occupy disk space, siidnce SRA
files typically weight several hundred Mb !).
Questions:
- What is the HTS platform used to sequence this sample ?
- Is this experiment single-end or paire-end sequencing ?
- What is the read length ?
- How many runs (i.e. lanes) are associated to this sample ?
- How many reads were produced (# of Spots) ?
- Select SRR540188 hyperlink. What is the sequence of the first read ?
At this point, you should be able to find a given dataset in GEO, and obtain the raw data (reads).